
Parakeet-API: High-Performance Local Speech Transcription Service
What is this?
parakeet-api is a local speech transcription service based on the NVIDIA Parakeet-tdt-0.6b model. Key features:
- Provides an OpenAI API-compatible interface for direct integration with pyVideoTrans
- Built-in clean web user interface — open a browser to use it
- Transcription output in standard SRT subtitle format
- Runs entirely locally — no internet required, no payments, no privacy concerns
- Compatible with
pyVideoTrans v3.72+
Open-source repository: https://github.com/jianchang512/parakeet-api
Use Cases
- Users who need offline speech recognition
- Users with high requirements for recognition speed and accuracy
- Users who prefer not to rely on cloud APIs and prioritize data privacy
- Users with an NVIDIA GPU (GPU acceleration provides a dramatic speed boost)
Prerequisites
| Requirement | Details |
|---|---|
| NVIDIA GPU (recommended) | CUDA-compatible GPU significantly improves speed; CPU mode is available but slower |
| FFmpeg | For audio/video format preprocessing |
| Python 3.10 | Required for source code deployment |
| pyVideoTrans v3.72+ | Required version of the translation tool |
Quick Start: Download the Bundle (Recommended for Beginners)
The bundle does not require installing Python or dependencies — just extract and run:
Download link 1 (Baidu Netdisk): Download from Baidu Netdisk
Download link 2 (HuggingFace): Download from HuggingFace.co
Steps
- Download the archive and extract it to any folder (path must not contain Chinese characters or spaces)
- Double-click the
启动.bat(Start) file - Wait for the command line window to show a startup success message — the browser will open automatically
Startup success screen:
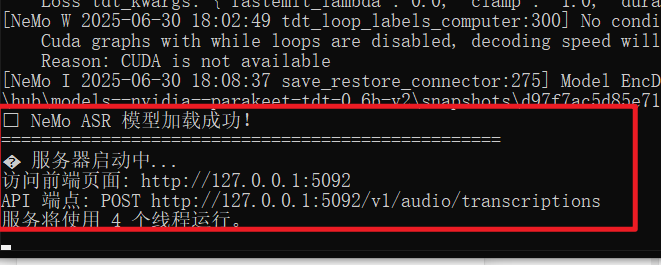
Seeing the interface above means the service started successfully. You can use it directly in the browser or integrate it with pyVideoTrans.
Using in pyVideoTrans
Parakeet-API integrates seamlessly with pyVideoTrans (v3.72 and above).
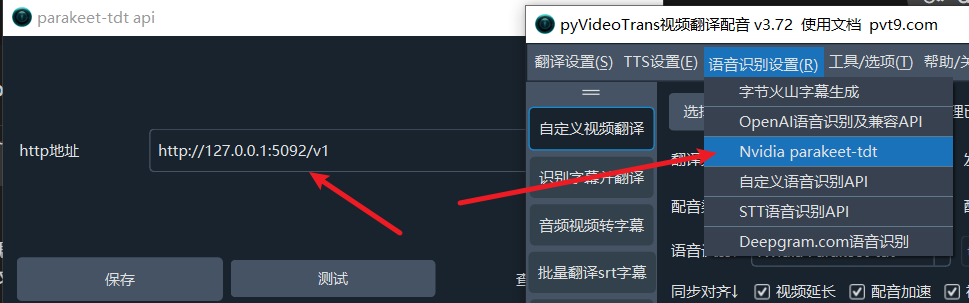
Configuration Steps
- Ensure
parakeet-apiis running locally (keep the command line window open) - Open
pyVideoTrans - In the menu bar, select Speech Recognition (R) → Nvidia parakeet-tdt
- In the configuration window, set the "HTTP address" to:
http://127.0.0.1:5092/v1 - Click "Save" to start using it
Parameter Reference
| Parameter | Value | Notes |
|---|---|---|
| HTTP address | http://127.0.0.1:5092/v1 | parakeet-api endpoint address |
| api_key | 123456 (any value) | Fixed internally by the program — no need to change |
Common Connection Errors
If pyVideoTrans reports a connection failure, check:
- Is parakeet-api running? — Is the command line window still open?
- Is the port correct? — Default port is
5092; ensure it's not occupied by another program - Address format — Must end with
/v1, i.e.,http://127.0.0.1:5092/v1 - Firewall — Check if your local firewall is blocking port 5092
Source Code Deployment
If you prefer to deploy from source or need custom configuration, follow these steps.
Installation and Configuration Guide
This project supports Windows, macOS, and Linux. Follow the steps below to install and configure.
Step 0: Set Up Python 3.10 Environment
If you don't have Python 3 installed, follow this tutorial: https://pvt9.com/_posts/pythoninstall
Make sure to install Python 3.10 — other versions may have compatibility issues.
Step 1: Prepare FFmpeg
This project uses ffmpeg for audio/video format preprocessing.
Windows (recommended):
- Download from the FFmpeg GitHub releases and extract
ffmpeg.exe - Place
ffmpeg.exedirectly in the project root directory (same level asapp.py). The program will detect and use it automatically — no environment variable configuration needed.
- Download from the FFmpeg GitHub releases and extract
macOS (using Homebrew):
bashbrew install ffmpegLinux (Debian/Ubuntu):
bashsudo apt update && sudo apt install ffmpeg
Step 2: Create Python Virtual Environment and Install Dependencies
Download or clone the project code to your local machine (preferably in a non-system drive folder with an English or numeric name)
Open a terminal and navigate to the project root directory (on Windows, type
cmdin the folder address bar and press Enter)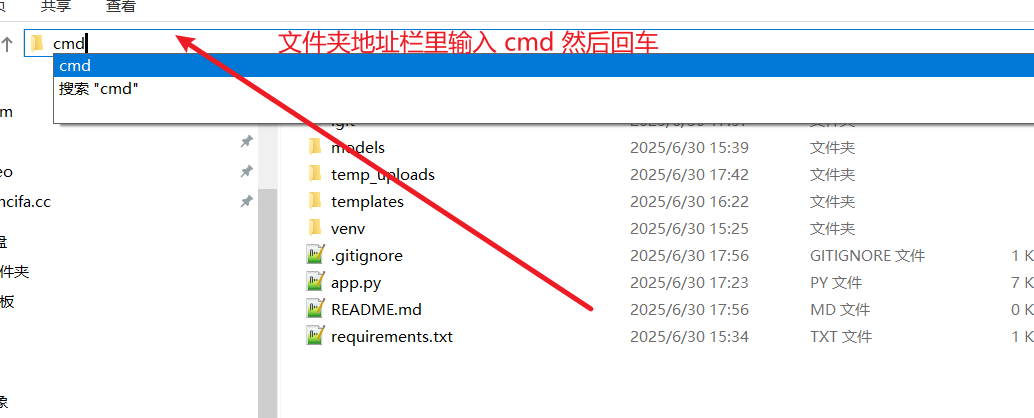
Create a virtual environment:
bashpython -m venv venvActivate the virtual environment:
- Windows (CMD/PowerShell):
.\venv\Scripts\activate - macOS / Linux (Bash/Zsh):
source venv/bin/activate
- Windows (CMD/PowerShell):
Install dependencies:
If you don't have an NVIDIA GPU (CPU only):
bashpip install -r requirements.txtIf you have an NVIDIA GPU (GPU acceleration): a. Ensure the latest NVIDIA driver and matching CUDA Toolkit are installed b. Uninstall any existing old PyTorch:
pip uninstall -y torchc. Install PyTorch matching your CUDA version (e.g., for CUDA 12.6):bashpip install torch --index-url https://download.pytorch.org/whl/cu126
Step 3: Start the Service
In a terminal with the virtual environment activated, run:
python app.pyFirst run will automatically download the model (~1.2 GB). Please wait patiently — the service will start automatically after the download.
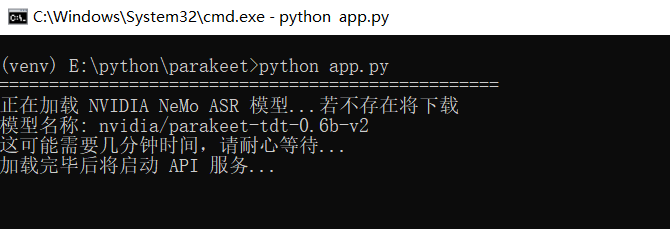
If you see a stream of log messages, don't worry — just wait:
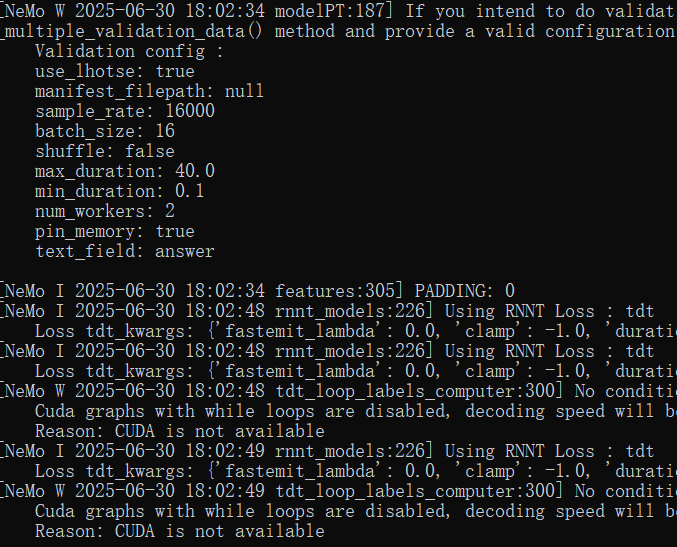
Startup success screen:
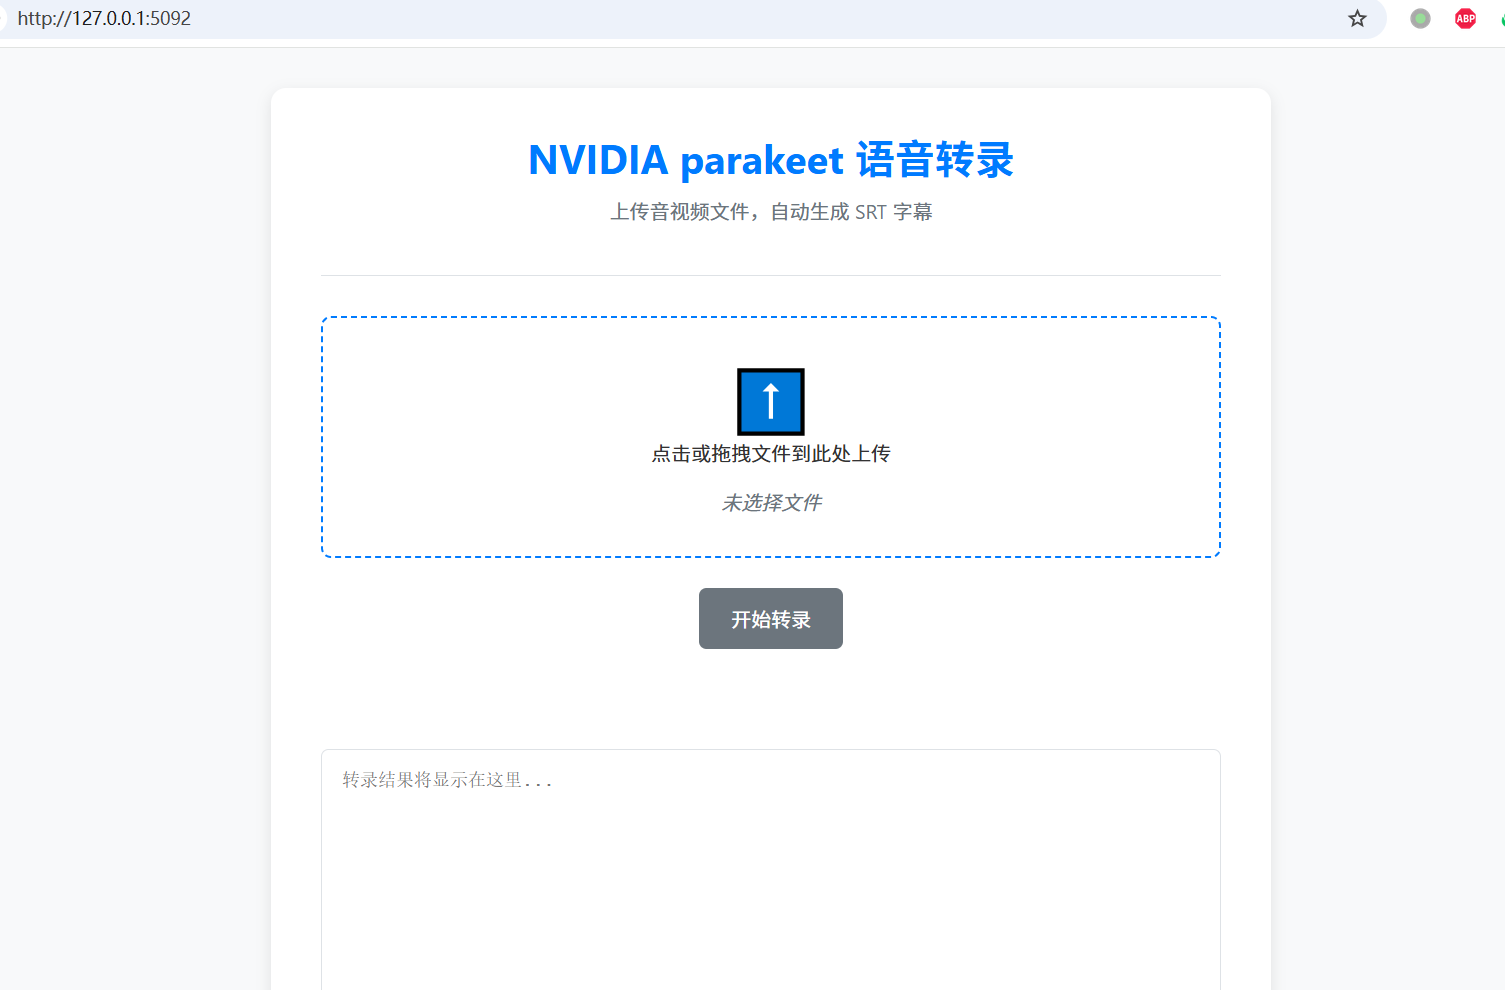
Seeing the interface above means the service started successfully.
Usage
Method 1: Web Interface
- Open in browser: http://127.0.0.1:5092
- Drag and drop or click to upload your audio/video file
- Click "Start Transcription" and wait for processing to complete — the SRT subtitle will appear below and can be downloaded
Method 2: API Call (Python Example)
Using the openai library, you can easily call this service:
from openai import OpenAI

client = OpenAI(
    base_url="http://127.0.0.1:5092/v1",
    api_key="any-key",
)

with open("your_audio.mp3", "rb") as audio_file:
    srt_result = client.audio.transcriptions.create(
        model="parakeet",
        file=audio_file,
        response_format="srt"
    )
print(srt_result)Optimal Configuration
| Setting | Recommended Value | Notes |
|---|---|---|
| Model | parakeet_srt_words | Default model, high accuracy |
| Compute device | GPU (CUDA) | Strongly recommended with NVIDIA GPU — tens of times faster |
| Audio format | WAV 16kHz mono | Best recognition results; other formats are auto-converted |
| Initial prompt | Domain-specific terms | Improves accuracy for specialized vocabulary |
Common Issues
Q: "CUDA out of memory" error on startup?
A: Insufficient VRAM. Try:
- Close other programs using VRAM
- Use a smaller model
- Switch to CPU mode
Q: Timeline is misaligned in transcription results?
A: Check if the input audio has issues. Convert to standard WAV format (16kHz, mono) with FFmpeg before transcribing.
Q: Browser doesn't open automatically after starting the bundle?
A: Manually visit http://127.0.0.1:5092 in your browser. If it can't be accessed, check the command line window for error messages.
Q: Which languages are supported?
A: The Parakeet model primarily supports English. For Chinese or other languages, consider using other recognition channels (such as faster-whisper).