GVS Hard Subtitle AI Extraction
Github Source Code: https://github.com/jianchang512/gvs
Pre-packaged Windows Version Download: Baidu Netdisk | github
GVS is a video hard subtitle extraction tool based on AI Vision Large Models.
This project utilizes advanced multimodal models like GLM-4.6V and Gemini to directly "read" text from video frames. It not only boasts extremely high recognition accuracy but also leverages AI's semantic understanding to automatically handle subtitle deduplication, sentence splitting, and timeline alignment.
💡 Core Concept: Abandon the cumbersome process of local OCR dictionary correction. Feed video screenshots directly to AI and let AI write the SRT subtitles for you.
✨ Core Features
- 🚀 AI-Native Processing: Uses Zhipu AI (free glm-4.6v-flash model) or Google Gemini for recognition, with strong anti-interference capability and multi-language support.
- 🆓 Free to Use:
- Default support for Zhipu AI's
glm-4.6v-flashseries models (completely free, use upon registration). - Supports Gemini free tier models.
- Default support for Zhipu AI's
- ⚡ Intelligent Batch Processing: Uses 1 frame per second sampling, packs every 20 frames for sending, reducing API request frequency and avoiding frequent rate limits.
- 🧠 Automatic Deduplication & Concatenation: Leverages LLM's contextual capabilities to automatically merge consecutive identical subtitles, generating perfect SRT timelines.
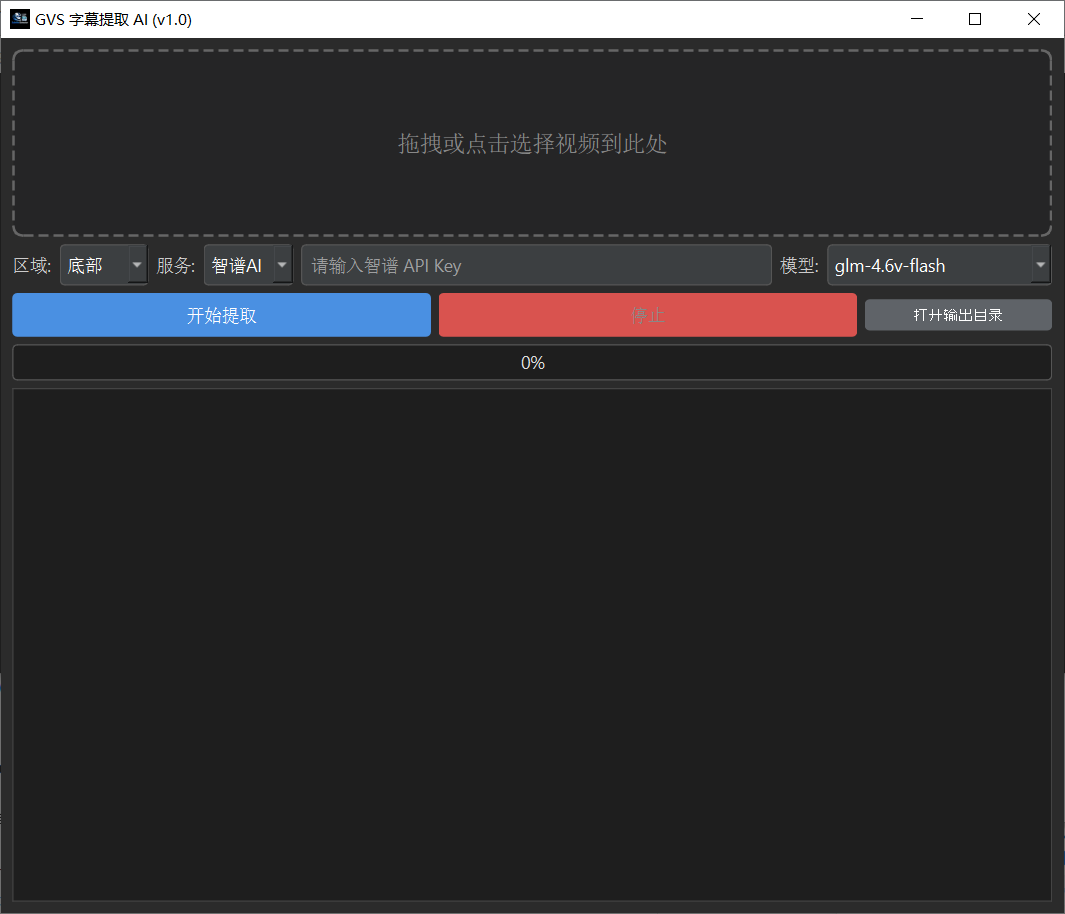
- 🖥️ Modern GUI: Dark-themed interface built with PySide6, supporting drag-and-drop operations and real-time log display.
- 🛠️ Rapid Deployment: Uses
uvfor dependency management, making environment setup lightning fast.
📸 Interface Preview
🛠️ Source Code Deployment Guide
This project recommends using uv for rapid deployment. Of course, you can also use traditional pip.
Prerequisites
FFmpeg: For video frame extraction.
- Windows: Download FFmpeg, extract it, and add the
bindirectory to your system'sPathenvironment variable. - Mac:
brew install ffmpeg - Linux:
sudo apt install ffmpeg - Verification: Type
ffmpeg -versionin the terminal; no error means success.
- Windows: Download FFmpeg, extract it, and add the
Python 3.10+
Method 1: Using uv (Recommended)
If you are a Python developer or prefer a cleaner, isolated environment:
- Install uv (if not installed): Go to this page to install: https://docs.astral.sh/uv/getting-started/installation/
- Clone the project:bash
git clone https://github.com/jianchang512/gvs.git cd gvs - Sync dependencies and run:bash
# uv will automatically create a virtual environment and install dependencies based on pyproject.toml and uv.lock
uv sync

# Run the software
uv run app.py
Method 2: Using pip
git clone https://github.com/jianchang512/gvs.git
cd gvs

# It's recommended to create a virtual environment first
python -m venv venv
# Windows activation
.\venv\Scripts\activate
# Mac/Linux activation
source venv/bin/activate

# Install dependencies
pip install -r requirements.txt
# Or install core libraries manually:
pip install PySide6 Pillow requests🔑 API Key Acquisition Guide
This project relies on cloud AI models, requiring an API Key. Both channels below offer free tiers:
1. Zhipu AI (Free, Recommended for Chinese Users)
- Model:
glm-4.6v-flash/glm-4v-flash - Cost: Free (Flash models are currently free and open).
- How to Get:
- Visit the Zhipu AI Open Platform.
- Register an account and complete real-name verification.
- Create a new API Key on the "API Keys" page.
- Copy the Key and paste it into the software.
2. Google Gemini
- Model:
gemini-2.5-flash/gemini-3-flash-preview - Cost: Provides a free tier (Free Tier), meaning a certain amount of free calls per day.
- How to Get:
- Visit Google AI Studio.
- Click "Create API key".
- Copy the Key and paste it into the software.
📖 Usage Instructions
- Start the Software: Run
app.py. - Import Video: Click the dashed box or directly drag and drop a video file into the software interface.
- Select Region:
- Most movie/TV show subtitles are at the bottom.
- For short video titles at the top, select Top.
- If unsure, select Full Screen (slightly higher Token consumption, but most stable).
- Configure Service:
- Select a service provider (Zhipu AI or Gemini).
- Enter the corresponding API Key (the software saves it automatically; no need to enter it next time).
- Select a model (recommended to use models with the
flashsuffix, as they are fast and free/cheap).
- Start Extraction: Click the "Start Extraction" button.
- View Results:
- After the progress bar completes, the software will automatically create an
outputfolder in the current directory. - The SRT subtitle file will be generated in the
outputdirectory. - Click "Open Output Directory" in the interface to go directly there.
- After the progress bar completes, the software will automatically create an
⚙️ File Structure
gvs/
├── app.py              # Main program entry point
├── config.json         # User configuration file (auto-generated)
├── api_debug.log       # API request debug log (for troubleshooting AI hallucinations or errors)
├── output/             # Subtitle output directory
├── pyproject.toml      # uv project configuration
└── uv.lock # uv dependency lock file🤝 Secondary Development & Contribution
Pull Requests or Issues are welcome!
Development Tips
- UI Modifications: The project uses pure code to build the PySide6 interface (no
.uifiles). Please modify thesetup_uimethod in theMainWindowclass directly. - AI Logic: Core logic is in the
AIClientclass. To add support for new LLMs (like Claude or OpenAI), please refer to the_call_zhipumethod for implementation. - Image Processing: Uses
Pillowfor cropping and compression; logic is in thecrop_image_bytesfunction.
⚠️ Frequently Asked Questions (FAQ)
Q: Getting an error "Cannot get video duration" after clicking start? A: Please ensure FFmpeg is installed on your computer and added to the system environment variables. Restart your computer or terminal and try again.
Q: Why do recognized subtitles occasionally have typos? A: Although AI is powerful, errors can still occur under extremely blurry, stylized text, or highly complex background conditions. It is recommended to use the "Bottom" cropping mode to reduce background interference.
Q: Getting a "429 Too Many Requests" error mid-task? A: This triggers the API rate limit. The software has a built-in retry mechanism and will automatically pause for 10 seconds before retrying. If this occurs frequently, it is recommended to check your API quota or switch models.
📜 Open Source License
MIT License. This means you can use, modify, and distribute this project for free, but you must retain the original author's copyright notice.
Acknowledgements
- requests
- pyside6
- Zhipu AI