
Quick Start for First-Time Users: Translating English Videos to Chinese Dubbing + Subtitles
This guide takes "English Original Audio ➔ Chinese Dubbing + Chinese Subtitles" as an example to walk you through your first translation project. (The process is exactly the same when translating between any other languages.)
💡 Beginner Tips & Must-Reads (Avoid 90% of Common Errors)
To ensure the software runs smoothly and to prevent common errors, please take 1 minute to check these three key points before starting:
1. Where should you extract the software?
- ✅ Recommended location: Extract into a simple folder path, such as
D:/videotrans(the shorter the path, the better). - ❌ Never place it here: Do not extract into system-protected directories like
C:/Program FilesorC:/Windows(these folders have strict permission limits, which prevent the software from saving output videos and temporary files).
2. How should you name and store your video files? (Most common error cause!)
- ❌ Avoid long, complex names: Videos downloaded from YouTube, Bilibili, etc., often have extremely long file names containing emojis (e.g., 🔥, 👍, 🌟). Importing these files directly can easily cause system crashes or errors on Windows.
- ✅ Best practice: Before importing, rename the video to a short, simple name (such as
video1.mp4orinterview.mp4, removing all emojis and special symbols), and store it in a simple directory (such as your Desktop or the root of drive D:).
3. Recommended: Enable "File name extensions" (Avoid selecting wrong files)
Windows hides file extensions by default, making it hard to tell apart video, audio, or subtitle files—especially when they share the same name.
- How to enable: Open any folder, click View at the top ➔ check File name extensions.
Step 1: Select the Video to Translate
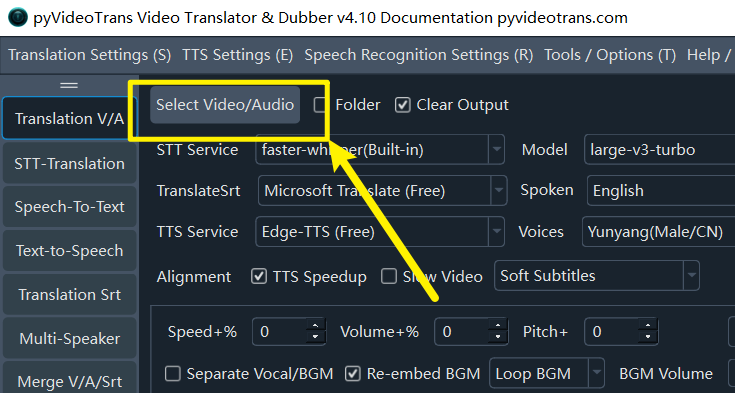
Click the Select Video/Audio button in the upper left corner of the software to import one or more English video files.
💡 Check for audible speech and remove special characters from file names:
- The video must contain clear human speech (some videos downloaded from YouTube may have no audio track; please play the video first to verify).
- Do not include emojis or special symbols in file names (especially long YouTube file names). Rename and simplify them before processing.
- When batch-importing multiple videos, make sure they all share the same spoken language.
- If
Clear Outputin the top left is checked, previously generated files will be deleted when re-translating the same video. If you wish to reuse existing results and avoid repeated transcription, uncheck this option.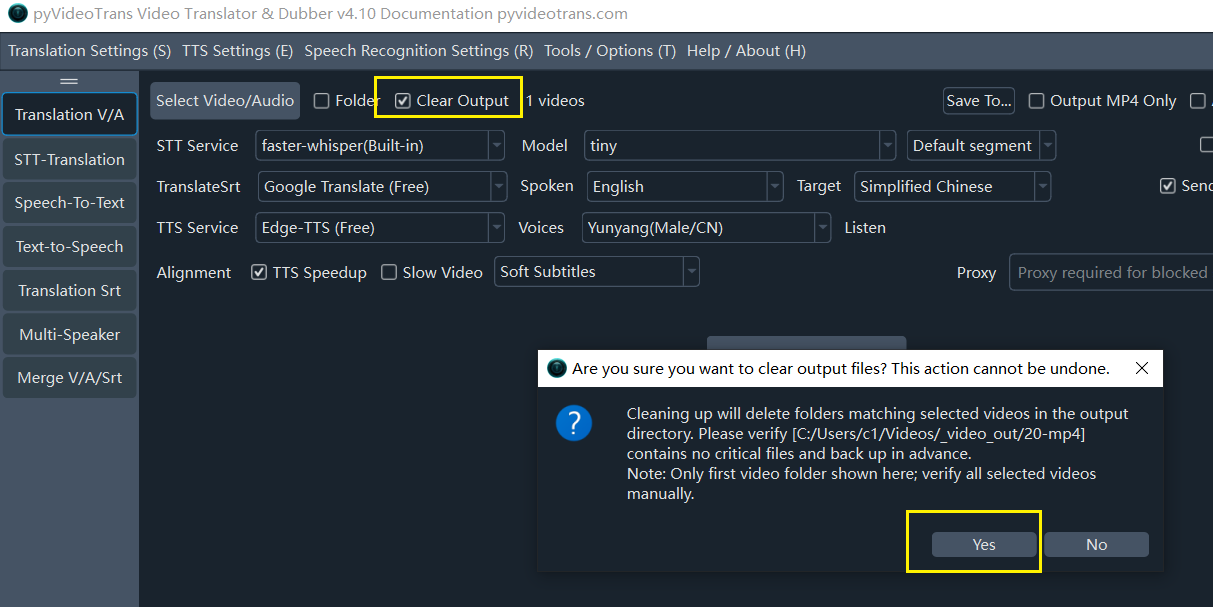
Step 2: Choose Speech Recognition (STT) Engine (Extract Subtitles from Video)
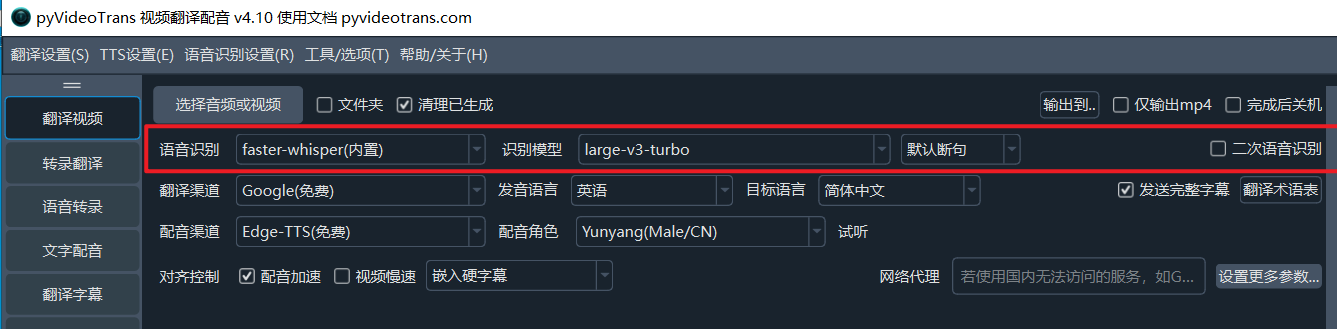
Transcribes spoken dialogue in the video into subtitle text.
- For first-time users, simply keep the defaults:
faster-whisper (Local)+large-v3-turbo. - If you are translating short-form or vertical videos, it is recommended to enable
SecondarySTTto generate shorter, more tightly synchronized subtitles. - For more details on speech recognition engines, check the STT Service Documentation.
If you only need to extract subtitles from audio/video, use the standalone Speech-To-Text feature in the left sidebar—it is faster and supports more spoken languages.
Step 3: Choose Translation Service (Translate Subtitle Text)
- Default engine is
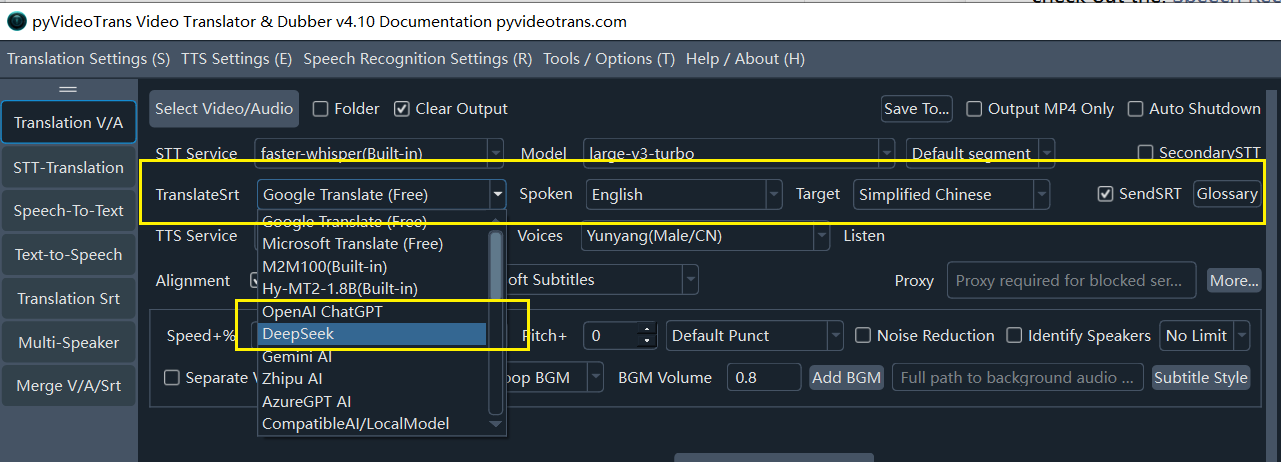
Google Translate (Free); if it cannot connect in your region, the software automatically falls back toMicrosoft Translate (Free). Spokenrefers to the original language spoken in the video. In this example, set it to English. If you are unsure, scroll to the bottom and selectAuto Detect.Targetis the language you want to translate into, which also sets the dubbing language. In this example, select Simplified Chinese.
Use caution with [Auto Detect] for Spoken Language
Starting from v4.12, Auto Detect has been added at the bottom of the Spoken language dropdown for media where the source language is unknown. If you select Auto Detect, please note:
- Make sure to only use
faster-whisper (Local)oropenai-whisper (Local)for STT, as most other engines strictly require an explicitly defined source language. - When using free engines like
Google Translate (Free)orMicrosoft Translate (Free)with mixed languages in the text, failing to specify a language may cause the engine to return original untranslated text. - Do not use bilingual subtitles with Auto Detect, as unexpected errors may occur.
Advanced Quality Settings (Recommended)
Select
DeepSeekin the translation dropdown for more natural phrasing. Enter your API Key in the prompt window (or configure it under top menu:Translation Settings -> DeepSeek). When using AI channels, checkingSendSRTis strongly recommended.Click here to create a DeepSeek API key (requires a small balance). Navigate to the API Keys menu on the left, click
Create API Key, name it, copy the generatedKey, and paste it intoMenu -> Translation Settings -> DeepSeek.
If you only want to translate an existing SRT file, use the standalone Translation Srt feature in the left sidebar.
Step 4: Choose Dubbing (TTS) Service (Chinese Voice in this Example)
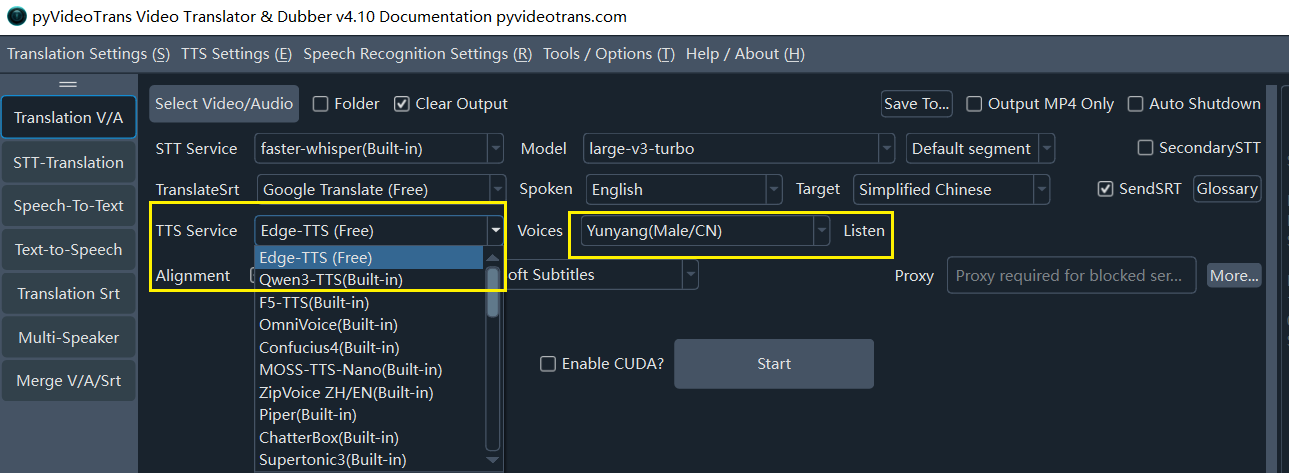
- For first-time use, keep the default
Edge-TTS (Free). - Select your preferred voice under "Voices", and click
Listennext to it to preview the sample. - If you do not need voice dubbing, set the voice to
No. - For more voice options, see the TTS Dubbing Service Documentation.
If you only want to generate speech from TXT or SRT subtitles, use the standalone Text-to-Speech tool in the left sidebar. It is faster and supports 99+ languages via Edge-TTS.
Step 5: Audio/Video Sync and Subtitle Embedding Settings
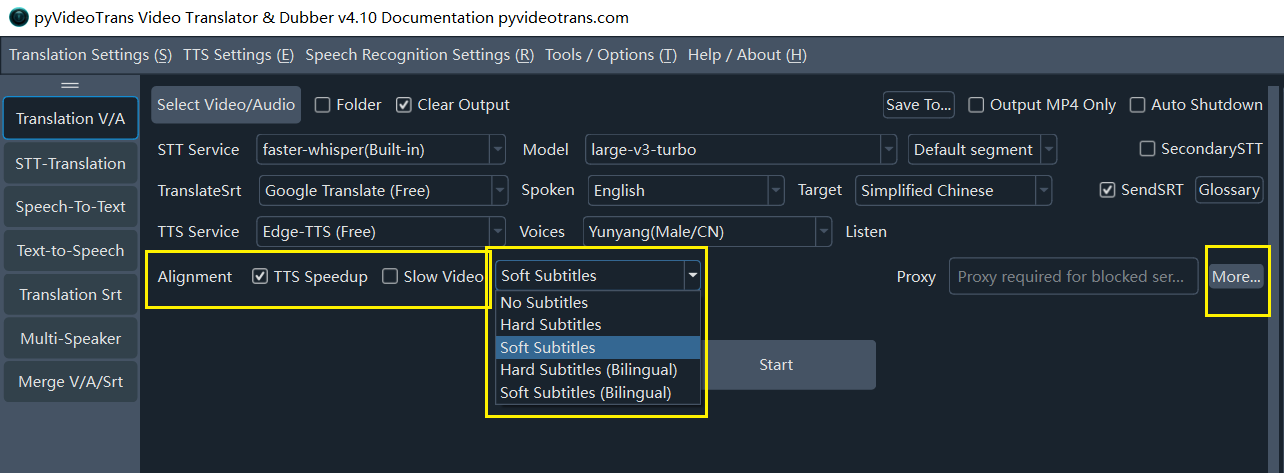
Because different languages have different syllable counts and sentence lengths, the duration of dubbed speech will almost never match the original speech length. Proper alignment settings keep audio and video synchronized.
- Recommended: Check
Auto SpeeduporSlow Video(or both); the software will automatically adjust playback speed to keep audio and video aligned. - Subtitle Embedding Options:
Hard Subtitles(Recommended): Subtitles are permanently burned into the video frame, ensuring they display on mobile devices, web players, and computers alike.Soft Subtitles: Embedded as an optional subtitle track; can be toggled on/off in desktop players, but usually does not show in web players.
Step 6: Background Audio Handling (Optional)
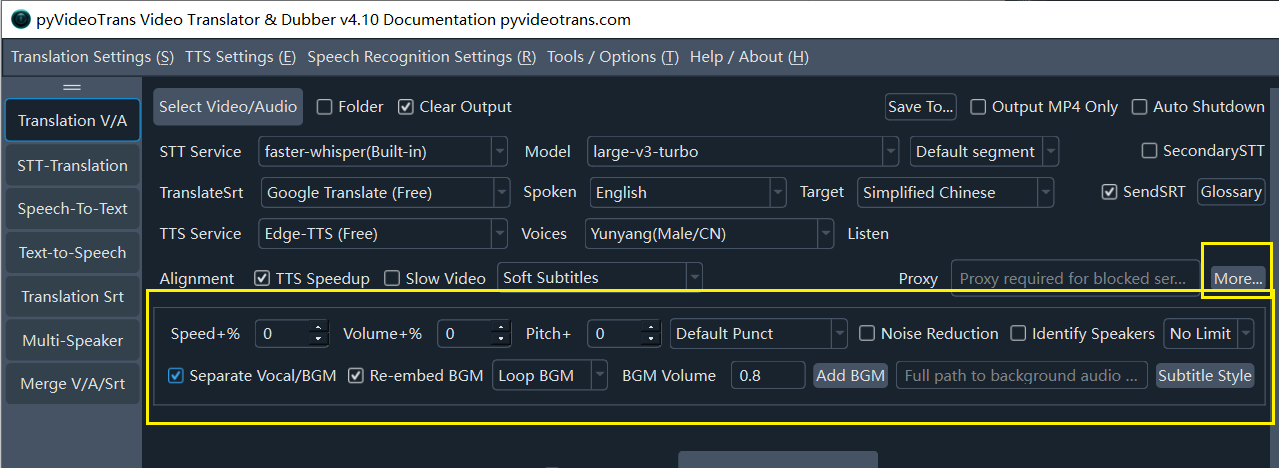
By default, the original audio track is replaced completely. If you want to keep the original background music, ambient sound, or sound effects:
- Click
More...➔ check bothSeparate Vocal/BGMandRe-embed BGM.
Step 7: Start Translation
- If your computer has an NVIDIA graphics card, check
Enable CUDA?to significantly speed up processing. - Click
Start Execution.
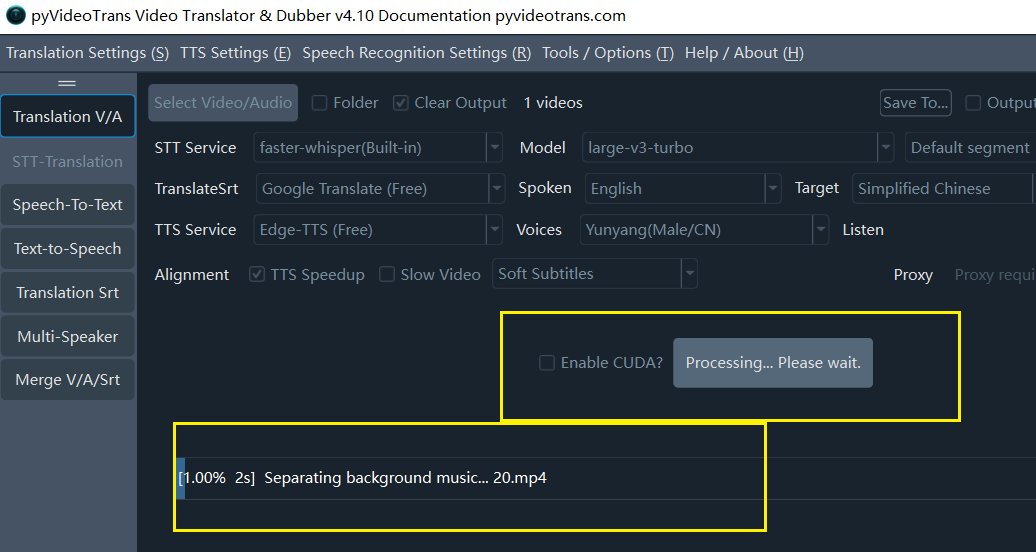
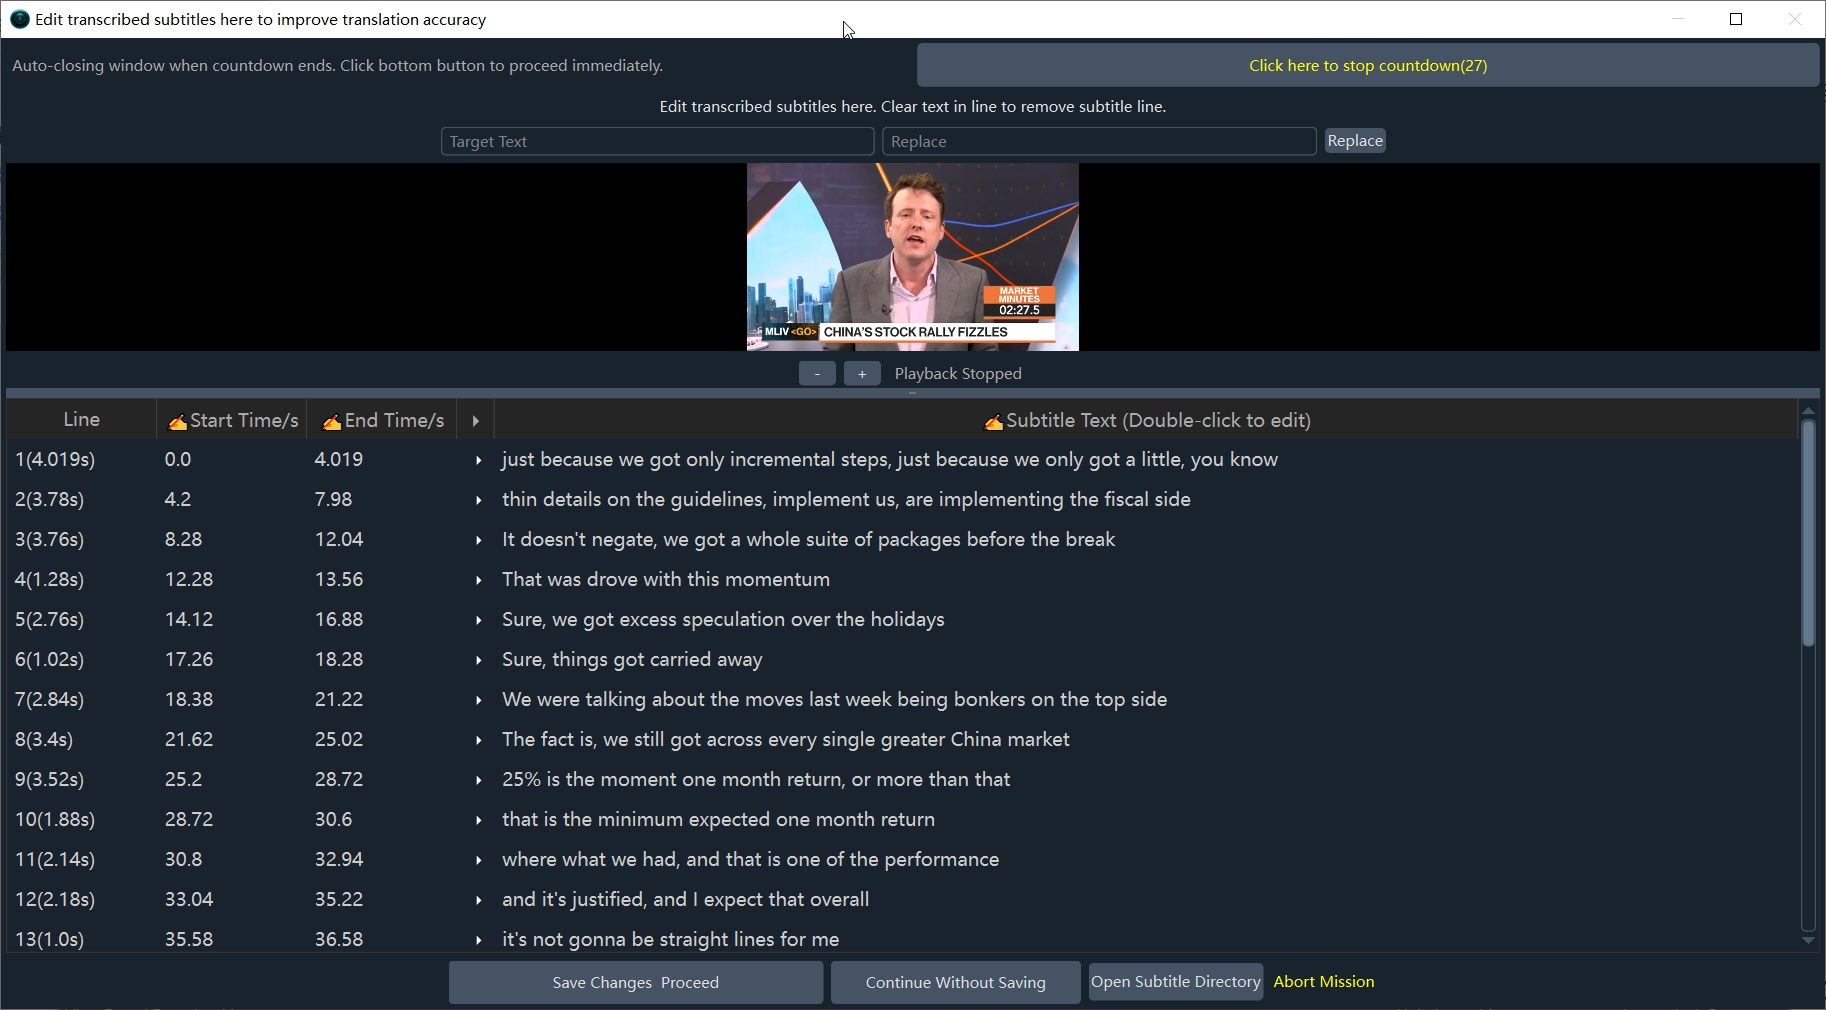
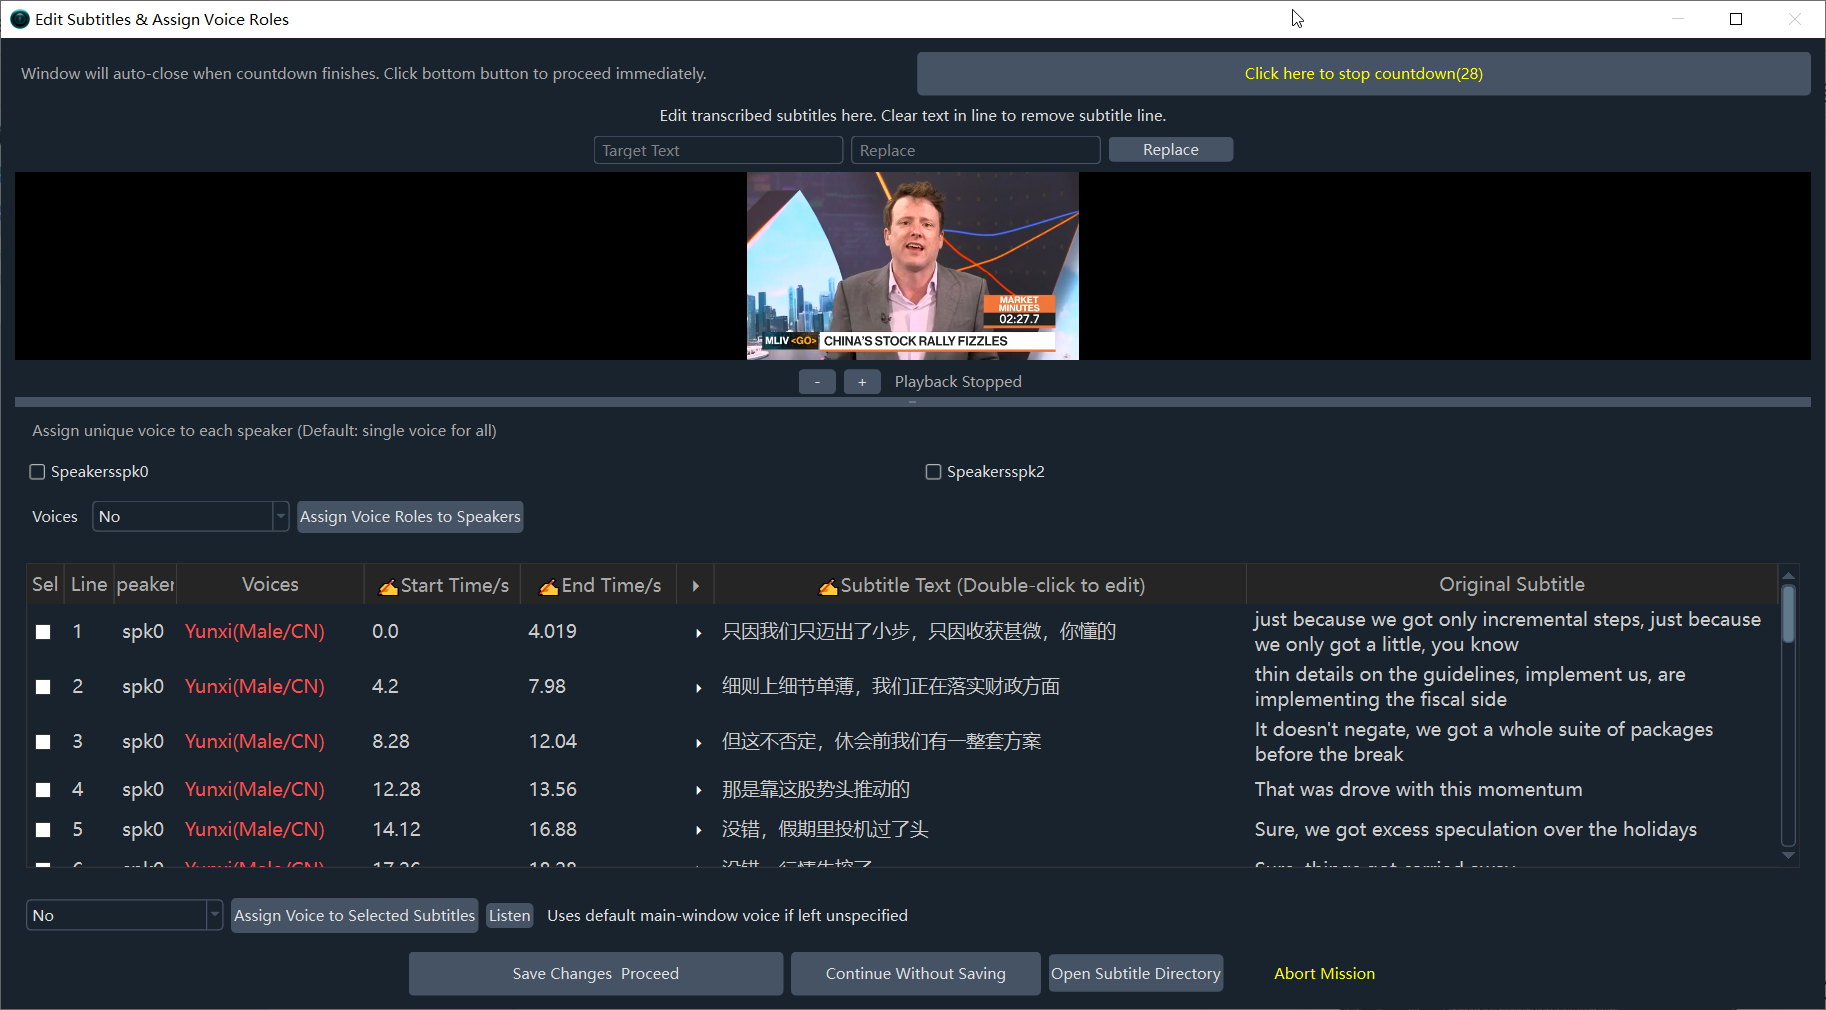
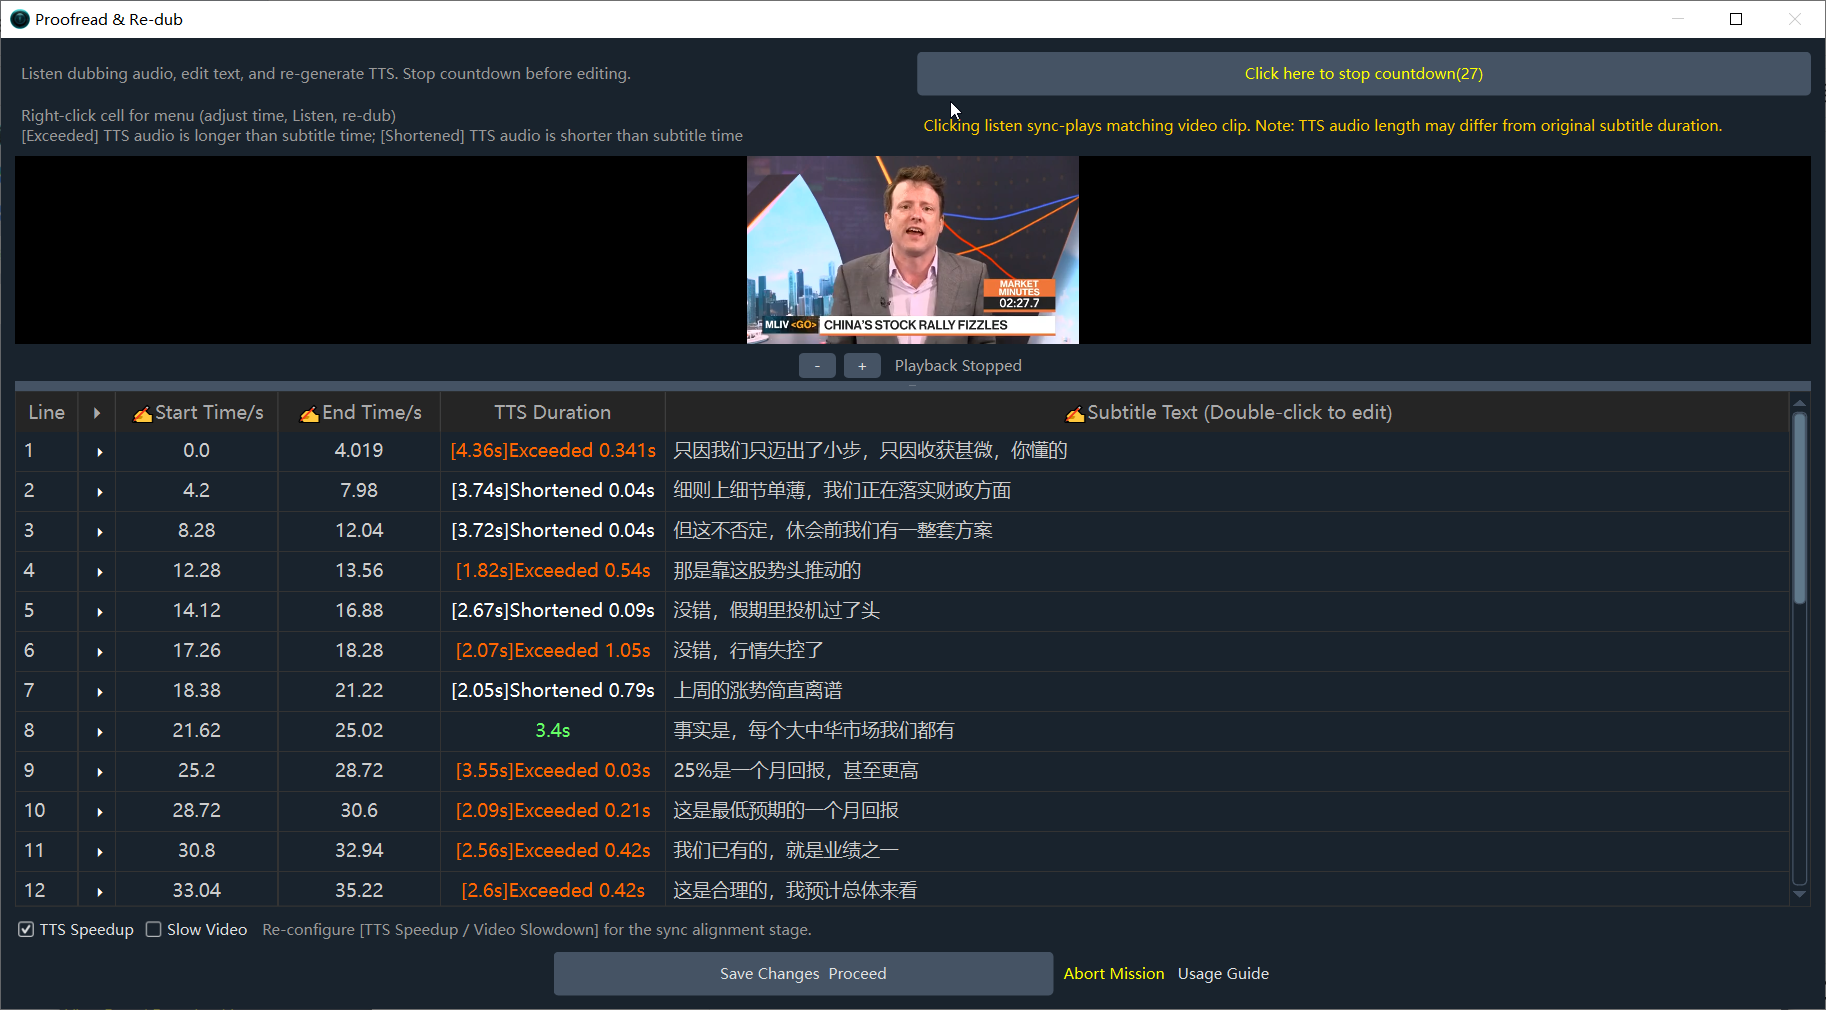
💡 Subtitle Proofreading Dialogs (Single-Video Mode Only):
When processing a single video, 3 to 4 editing windows will pop up sequentially (Transcribed Subtitles ➔ Translated Subtitles, etc.):
- To edit: Directly fix any typos in the text area, then click
Save Changes & Proceed.- To skip editing: Do nothing; the window will automatically proceed after a 30-second countdown, or click
Continue Without Saving/Save Changes & Proceedmanually.
Step 8: View Output Video and Assets
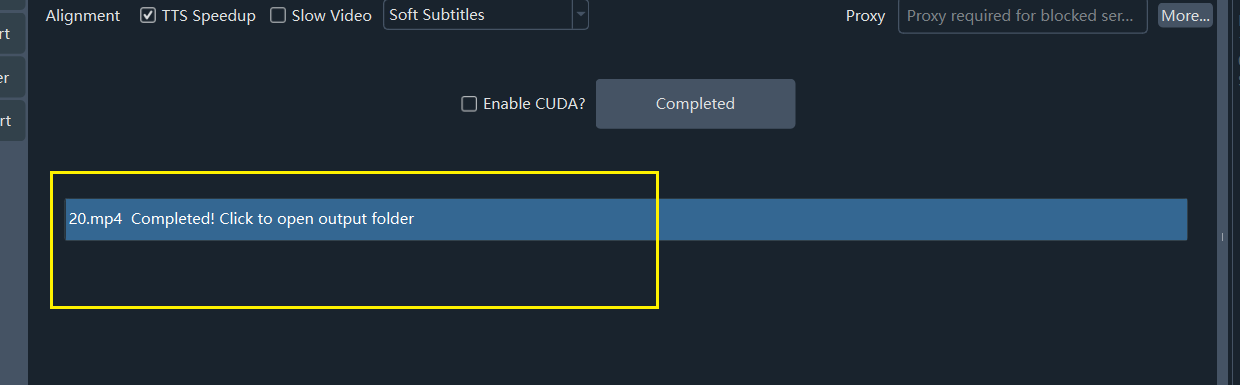
Once the bottom progress bar shows Completed, simply click the progress bar to open the output folder directly.
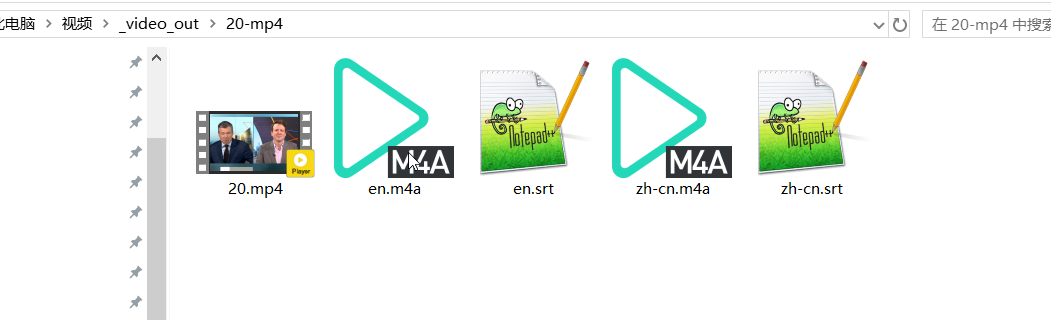
File breakdown in the output folder:
.mp4: The final completed video with translated dubbing and subtitles.en.srt: The transcribed original English subtitle file.zh-cn.srt: The translated Chinese subtitle file.en.m4a: The isolated vocal audio extracted from the original video.zh-cn.m4a: The newly synthesized Chinese dubbing audio track.